Manage Single Sign‑On (SSO)
Configure SAML-based Single Sign-On (SSO) for your organization. This lets users authenticate with your Identity Provider (IdP) such as Azure AD, Google Workspace, or Okta.
Prerequisites
- Organization admin access in CloudPie
- Access to your IdP SAML settings (Metadata URL or manual fields)
- (Optional) List of SAML group names to map to CloudPie roles
- At least one local admin account kept for emergency access
Navigate to This Page
- Open the Dashboard.
- In the sidebar, click Settings → Manage Single Sign‑On.
- The SSO Configuration page opens.
Example Image: Manage SSO Configuration Page
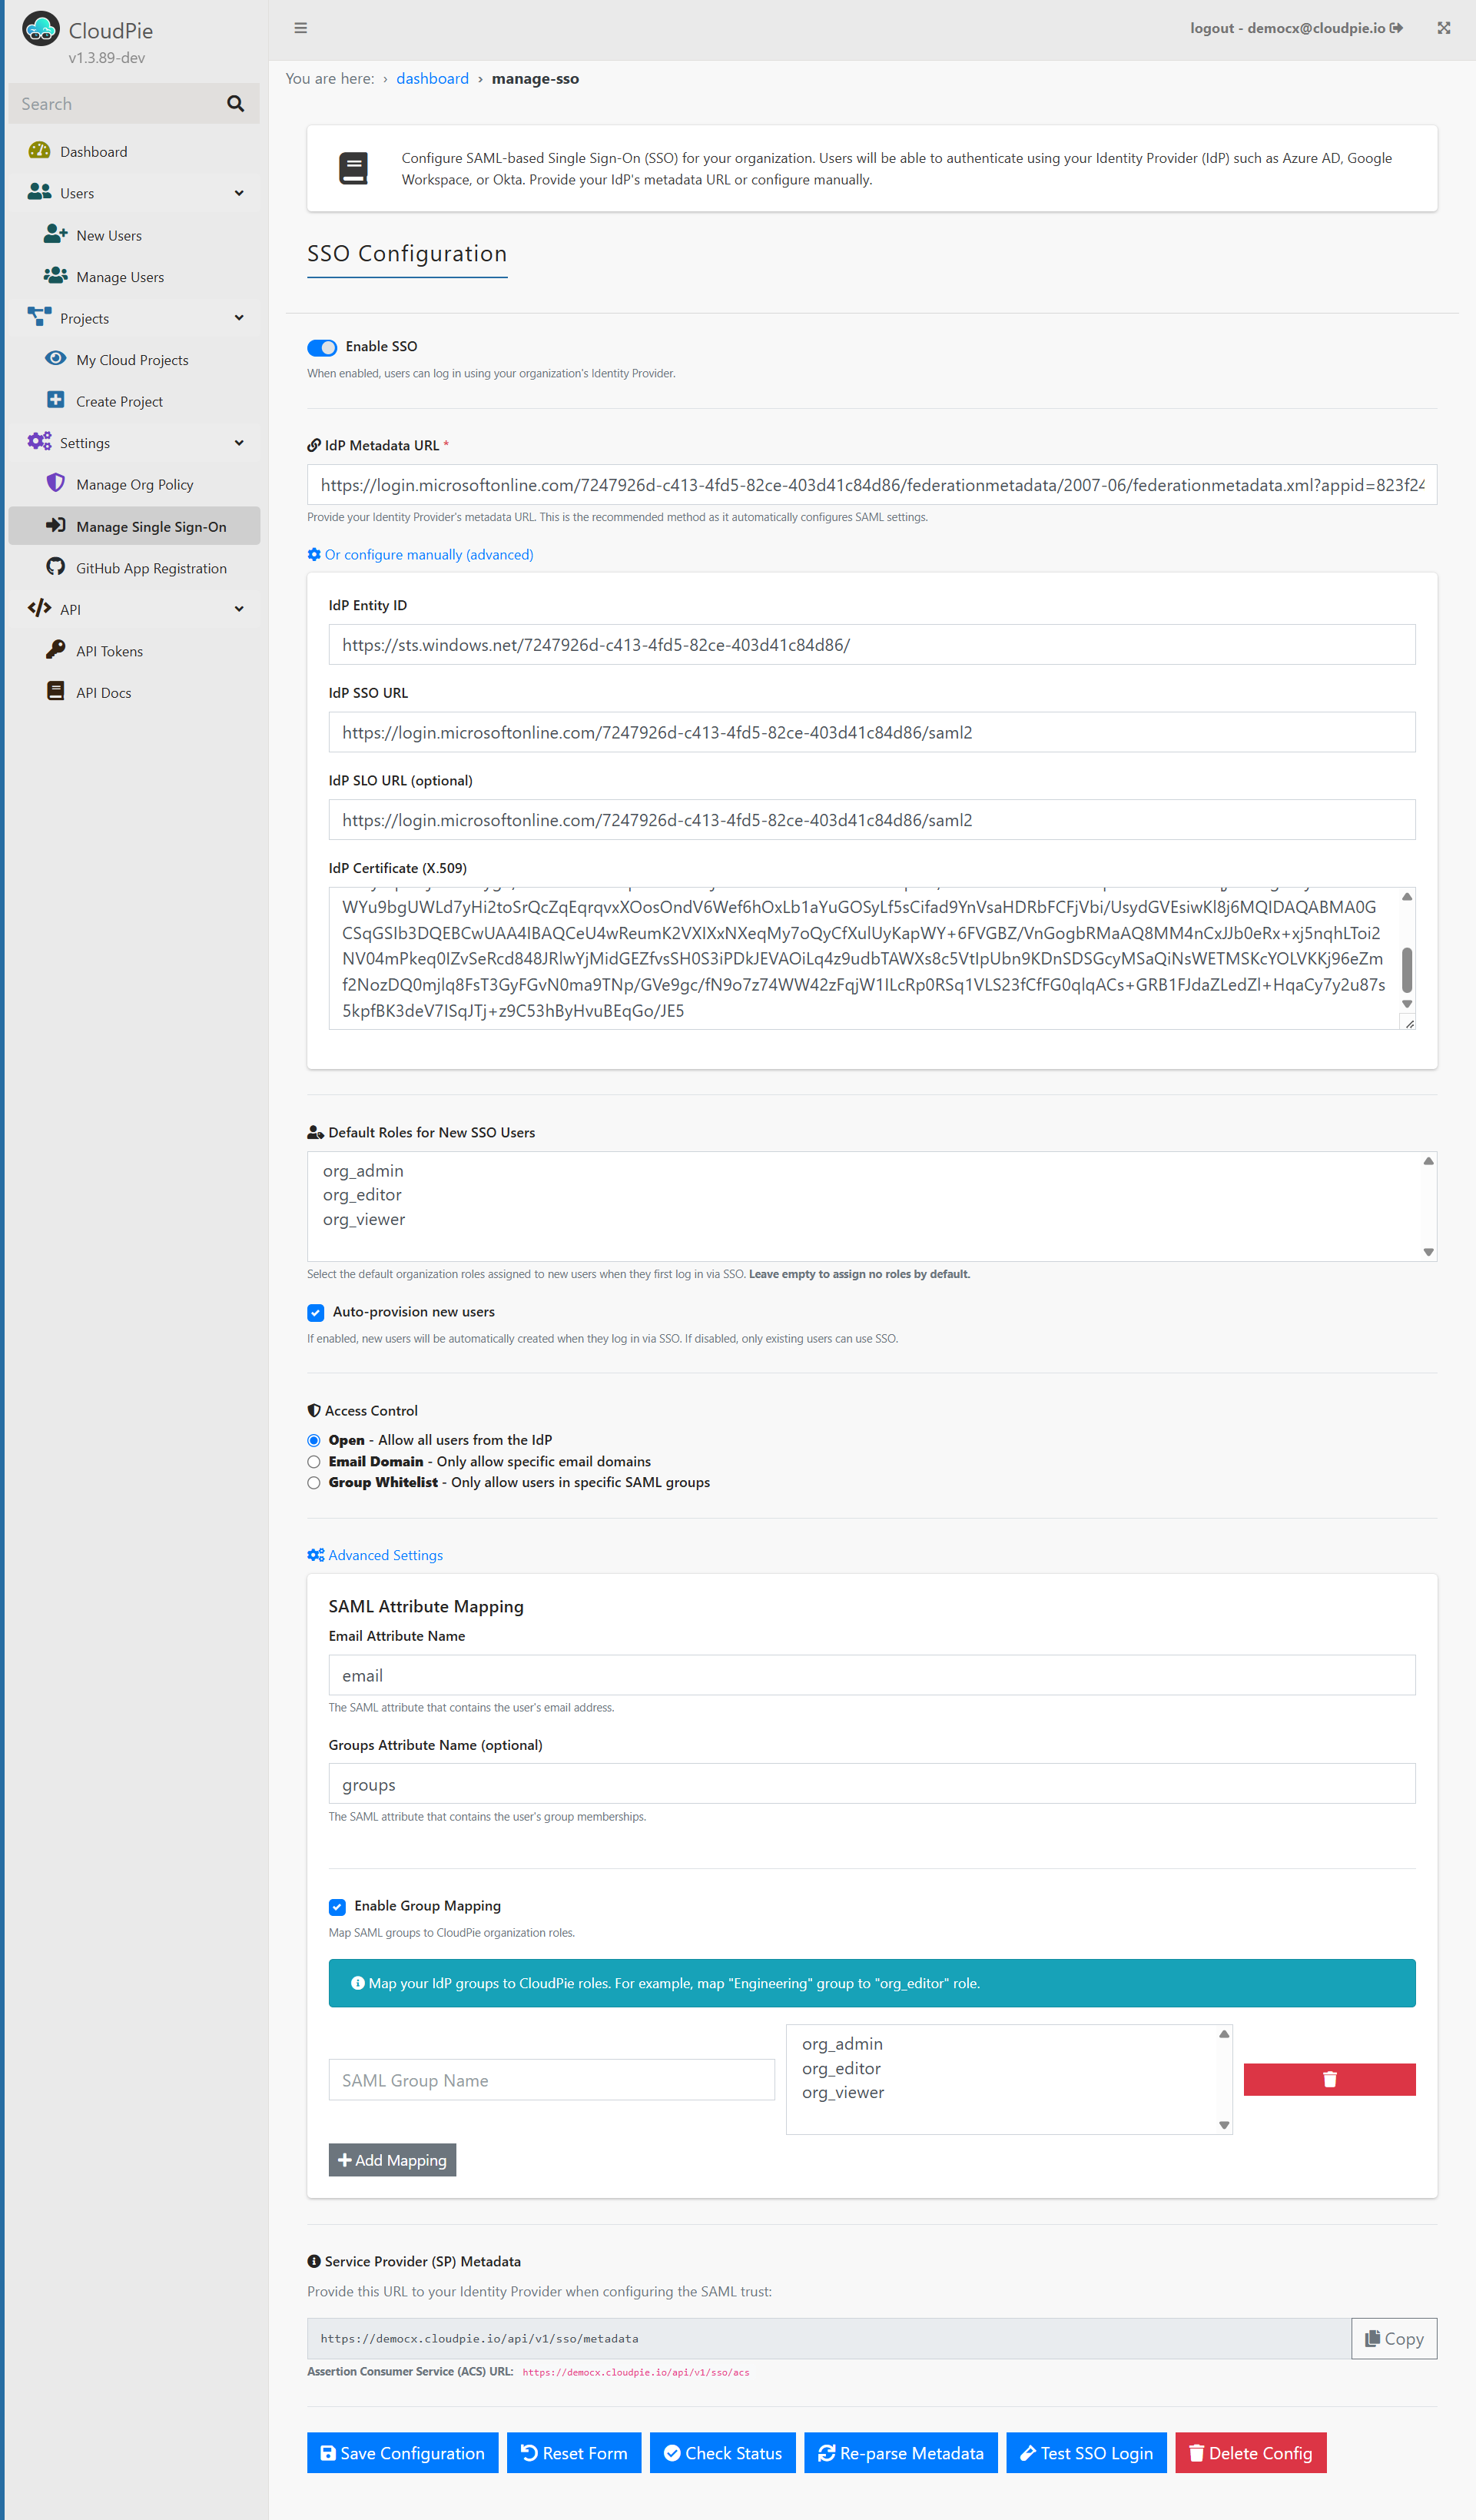
Configure SSO
Option A — Using Metadata URL (Recommended)
- In IdP Metadata URL, paste your IdP’s metadata endpoint.
- Click Re‑parse Metadata (or Save Configuration) to fetch:
- IdP Entity ID
- SSO URL
- SLO URL (if provided)
- X.509 Certificate
Example
Option B — Manual (Advanced)
If a metadata URL isn’t available, expand Or configure manually (advanced) and enter: - IdP Entity ID - IdP SSO URL - IdP SLO URL (optional) - IdP Certificate (X.509)
CloudPie validates required fields before enabling SSO.
Default Roles for New SSO Users
- Select zero or more organization roles to assign on a user’s first SSO login.
- Leave empty to assign no roles by default.
- Roles can be edited later from Manage Users.
Auto‑Provisioning
- On: New users are created automatically on first SSO login (defaults applied if set).
- Off: Only existing users can log in via SSO.
Access Control
Choose who can log in via SSO: - Open — Allow all users from your IdP. - Email Domain — Allow only specific email domains (comma separated). - Group Whitelist — Allow only users in specific SAML groups.
Attribute Mapping
Tell CloudPie which SAML attributes contain user data:
- Email Attribute Name (default: email)
- Groups Attribute Name (optional; default: groups)
Group Mapping
Map IdP group names to CloudPie roles.
- Enable Group Mapping.
- For each row, enter SAML Group Name and select one or more CloudPie Roles.
- Click Add Mapping to insert more rows. Save when done.
How role sync works
- If Group Mapping is enabled: user roles are rewritten on every login based on the mapping (invalid roles are ignored).
- If Group Mapping is disabled: CloudPie does not change user roles on login; only saml_groups and last_login are updated.
- Default roles apply only on a user’s first login (when auto‑provisioning).
Service Provider (SP) Metadata
Share these with your IdP to establish trust:
-
Metadata URL
-
Assertion Consumer Service (ACS) URL
Actions
- Save Configuration — Persist the current settings.
- Reset Form — Reload last saved values.
- Check Status — Verify required SAML fields are present.
- Re‑parse Metadata — Re-fetch and apply metadata from the IdP (modal confirmation).
- Test SSO Login — Launch a test SAML login.
- Delete Config — Remove the SSO configuration.
Troubleshooting
- Login flickers/returns to Sign‑in: Incorrect ACS URL or certificate → re‑parse metadata, confirm IdP app settings.
- Role changes don’t stick: Group Mapping is enabled → roles are overwritten on login.
- User recreated after deletion: Auto‑provision is enabled → disable it to prevent auto‑creation.
- Cannot log in with password: SSO enabled for org; use IdP login or disable SSO temporarily.
Related
- Manage Users — change roles or remove users
- GitHub App Registration — organization integration for repository discovery